Sierra Chart – installation guide
Installation
-
Download Sierra Chart plugin from Documents

-
Extract files to Sierra Chart Data folder
-
Folder can be found in Sierra Chart application,
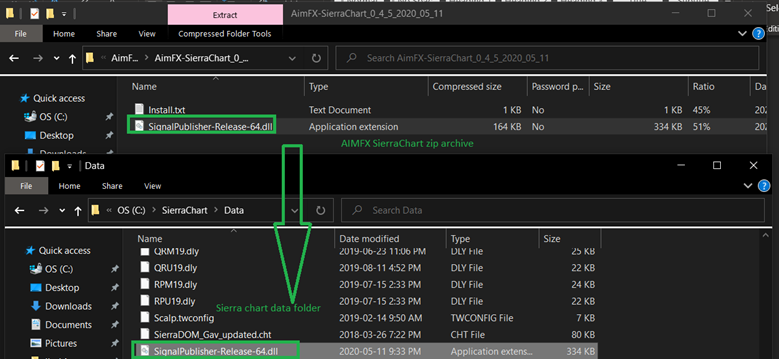
From top menu, Global Settings -> General Settings. In my case it is C:\SierraChart\Data\

-
Copy files from ZIP Archive to Sierra Chart DATA Folder
-
Restart Sierra Chart platform
-
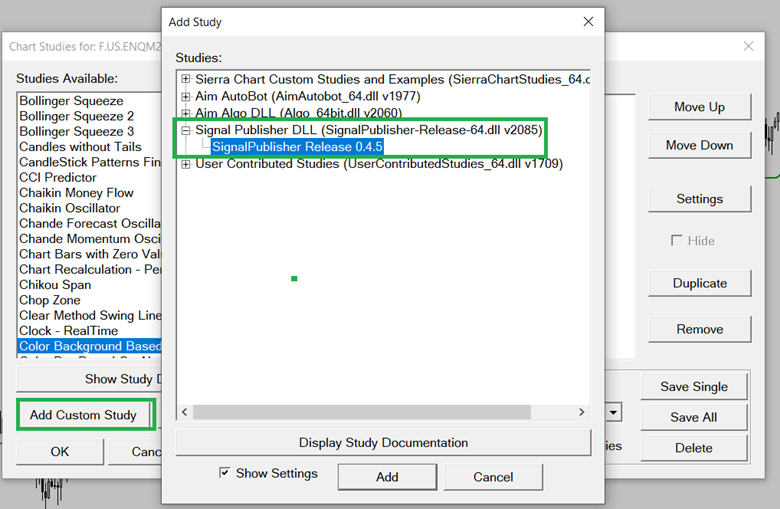
Study should be visible in under “Add Custom Study” section
At this stage platform plugins are installed on Sierra Chart platform.
Configure Sender/master account
-
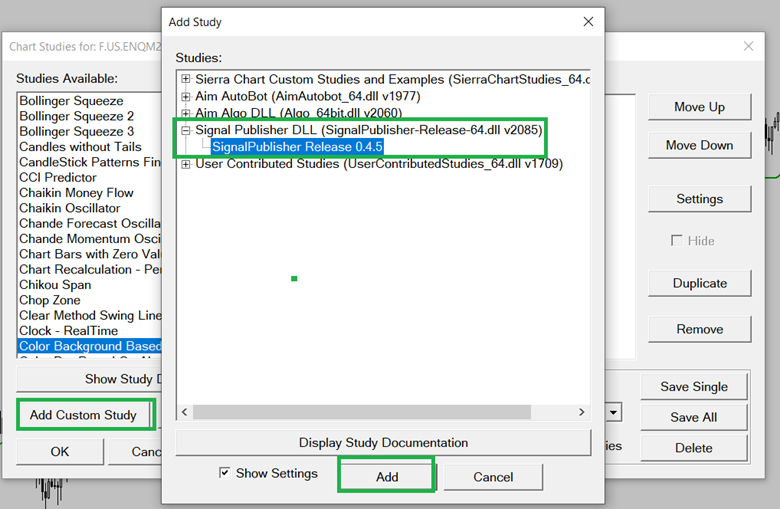
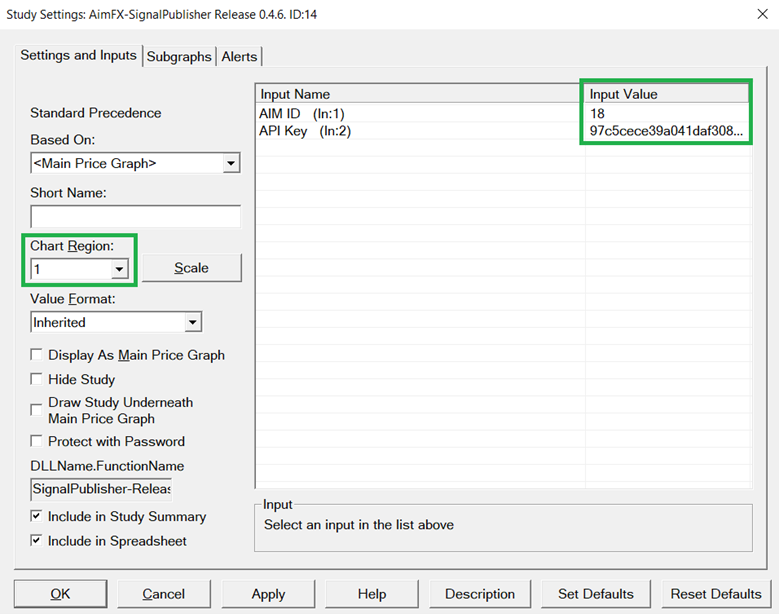
Add “SignalPublisher” study to the chart
-
Configure AIM_ID and API_KEY input values
-
Make sure Account platform is defined as “sierra chart”
-
Account should be connected “Trade copying is enabled”

Troubleshooting
-
Cannot find SignalPublisher DLL on Study list
a. Please check your Sierra Chart version – Help -> About
b. Make sure you are using 64 bit version
c. Make sure your Sierra build is compatible with SignalPublisher build version
d. It’s advised to use keep Sierra Chart up to date by running regular updates Help -> Download Current Version
-
AIM ID does not exist - make sure you typed correct account in Study settings
-
API Key Error – please make sure your API Key input parameter is filled with corresponding API Key from admin panel
-
Could not reach target server – this can be due to network issue, please check internet connection
Configure Receiver/follower account
-
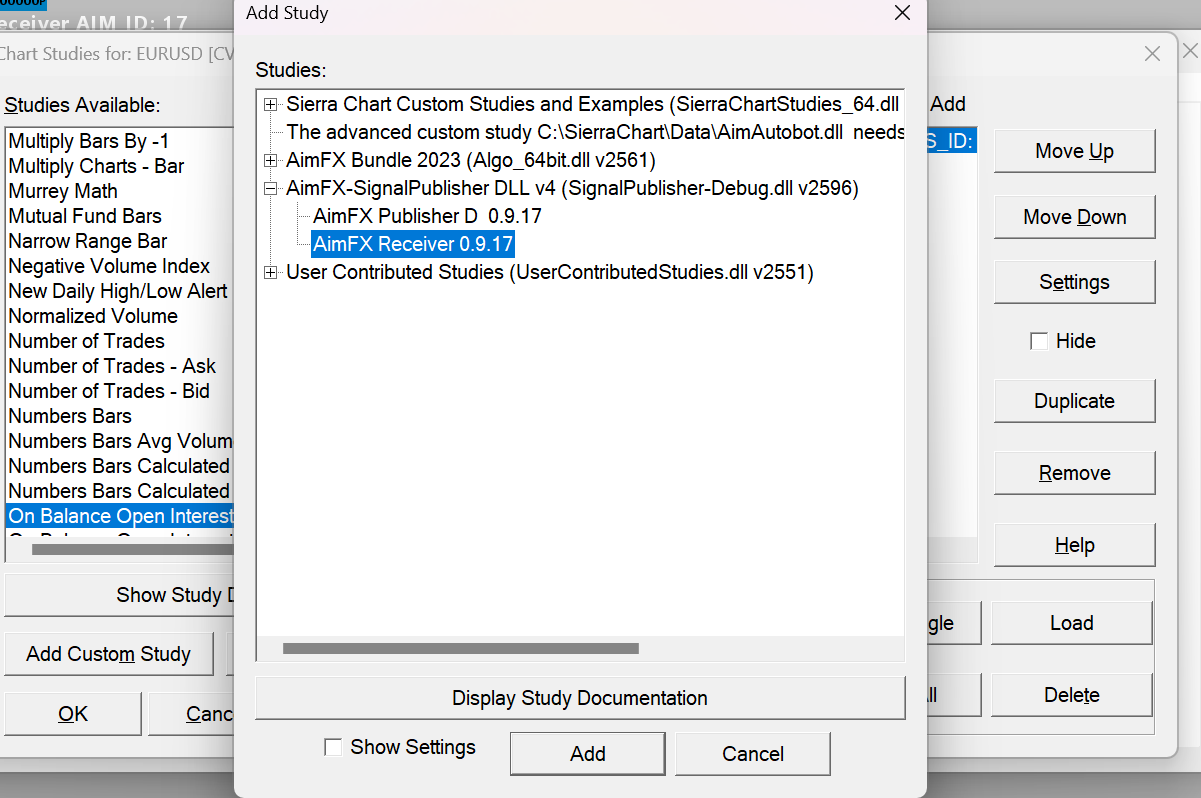
Add “SignalReceiver” study to the chart
-
Configure AIM_ID and API_KEY input values

-
Make sure Account platform is defined as “sierra chart”
-
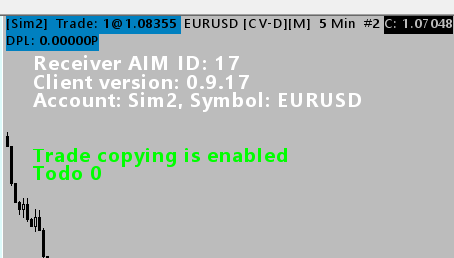
Account should be connected “Trade copying is enabled”
-
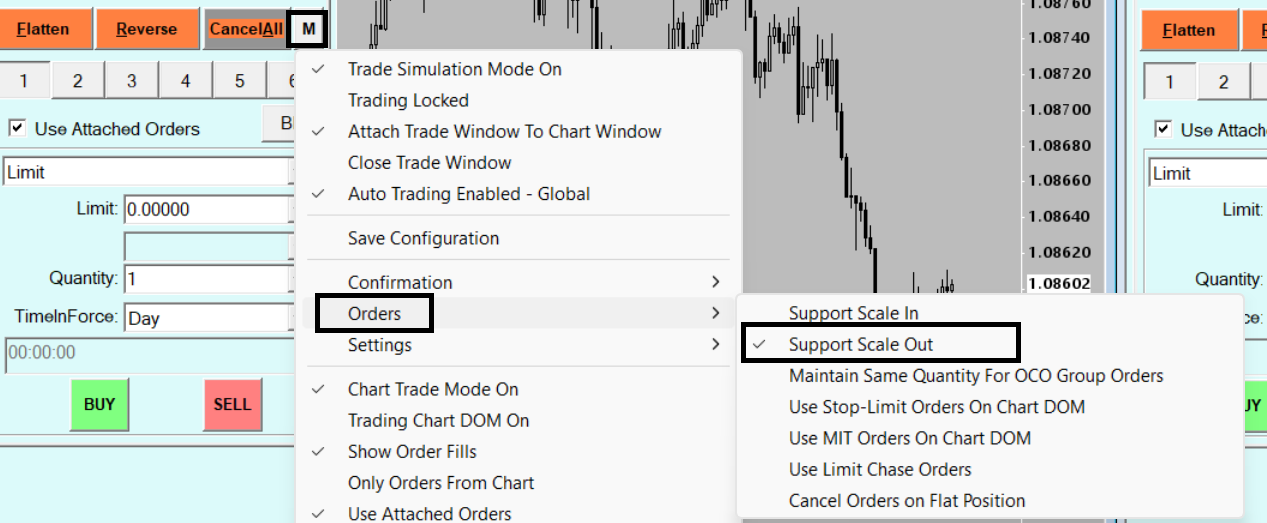
Adjust Scale-out setting by enabling "Support Scale Out" setting
